
How to Set Up a Balloon Garland for Beginners
Table of Contents
- Why a Balloon Garland Is the Easiest Backdrop for Beginners
- Balloon Garland Supplies: What You Actually Need
- Balloon Garland Size Guide: Planning Length and Fullness
- Step-by-Step: How to Set Up a Balloon Garland
- How to Hang a Balloon Garland Without Wall Damage
- How Long Does a Balloon Garland Take to Make?
- Troubleshooting: Fixing Popped Balloons, Gaps, and Sagging
- Conclusion
- Frequently Asked Questions
Last Updated: October 19, 2026
Why a Balloon Garland Is the Easiest Backdrop for Beginners
A balloon garland is a flexible row of connected balloons that hangs as a backdrop for parties, showers, and graduations.
That matters if you have ever stared at a photo wall and assumed it took a professional crew. It doesn’t.
At RI Party Store, we sell these supplies every week, and the same questions come up again and again: how many balloons, how long will it take, and how do I hang it without wrecking the paint.
The single biggest beginner mistake is inflating every balloon to the same size. Varied sizes are what make a garland look organic instead of like a sausage link.
Balloon Garland Supplies: What You Actually Need
A balloon garland kit needs four core items: balloons in two or three sizes, a balloon strip or balloon tape, a hand pump, and ribbon or string for hanging. Everything else is optional.
Skip the electric inflator on your first try. A hand pump gives you more control over size, and it costs less.
- Balloons: 11-inch and 5-inch latex in your color palette
- Balloon strip or balloon tape: the plastic strip with holes that holds clusters
- Hand pump: faster than your lungs and kinder to your jaw
Buy 20% more balloons than your plan calls for. Latex pops, and a few spares save you a second trip to the store the morning of the party.
Supplies Checklist by Garland Length
Use this table to plan quantities before you shop. Lengths assume a medium-fullness garland with mixed sizes.
| Garland Length | 11-inch Balloons | 5-inch Balloons | Balloon Strip | Est. Build Time |
|---|---|---|---|---|
| 6 ft | 30-35 | 25-30 | 1 strip (10 ft) | 45-60 min |
| 10 ft | 50-60 | 40-50 | 2 strips | 1.5-2 hrs |
| 15 ft | 75-90 | 60-75 | 3 strips | 2.5-3 hrs |
| 20 ft | 100-120 | 80-100 | 4 strips | 3-4 hrs |
Balloon Garland Size Guide: Planning Length and Fullness
Plan for about 8 to 10 balloons per foot of garland at medium fullness. A 10-foot garland needs roughly 80 to 100 balloons total, split between large and small sizes.
Fullness is a choice, not a rule. A sparse garland reads modern and airy. A dense one reads lush and photo-ready.
Measure your backdrop before you buy anything. A common approach is to run the garland slightly wider than the table or arch it frames, so the ends extend past the edges.
- Sparse: 6-7 balloons per foot, best for minimal styling
- Medium: 8-10 balloons per foot, the safest all-around choice
- Full: 11-13 balloons per foot, best for photo backdrops
Step-by-Step: How to Set Up a Balloon Garland
Here is the full beginner workflow. Set aside a flat work surface, inflate in batches, and build the garland on the table before it ever touches the wall.
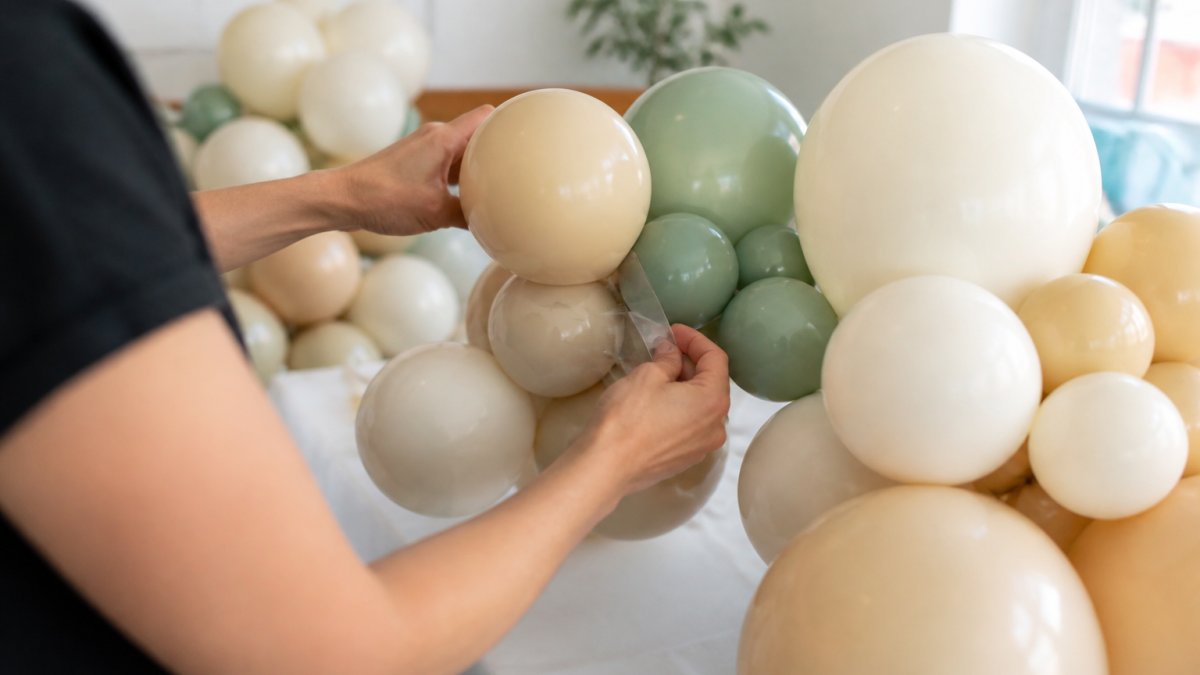
Step 1: Inflate and Size Your Balloons
Inflate balloons in three sizes: large, medium, and small. The most reliable way to get consistent sizes is a sizing template, a rigid board or box with circular cutouts at 5 inches, 8 inches, and 11 inches.
A measuring tape or a measuring cup works as a backup: hold the balloon against the tape and stop inflating when the widest point hits your target diameter.
- Inflate 11-inch balloons to full size for the base
- Inflate some 11-inch balloons to about 8 inches for mid-size variety
- Inflate 5-inch balloons for filler and gaps
Inflate in batches by size, all the large balloons first, then the mediums, then the smalls. Batching keeps your reference balloon consistent and makes cluster assembly faster because you are not switching sizes mid-build.
Step 2: Tie Balloons into Pairs and Clusters
Tie two balloons together at the necks to form a pair. Then twist two pairs together at the center to make a four-balloon cluster. The figure-eight wrap is the core skill: hold two pairs back-to-back, twist the necks of one pair around the necks of the other, and lock them together.
A few mechanics that prevent pops and loose clusters:
- Keep your fingernails short; a sharp edge is the most common cause of a pop while tying
- Tie the neck twice with a simple overhand knot, pulling snug but not tight enough to stretch the latex
- When twisting pairs together, twist in the same direction so the cluster holds its shape
- If a cluster feels loose, add a half-twist at the center rather than retying
Once you can make a cluster in under a minute, the rest of the garland moves fast. Most beginners hit that rhythm after about 10 clusters.
Step 3: Connect Clusters onto the Garland Strip
Push the neck of each cluster through the holes in the balloon strip. Work from one end and alternate large and small clusters as you go, large, small, large, small, so the garland reads organic rather than uniform.
A few sequencing rules that keep the strip manageable:
- Work in sections of about 3 feet, then connect the strips end to end
- Leave the first and last hole of each strip empty so you can link strips with ribbon
- Push the cluster neck all the way through the hole and give it a quarter turn so it locks
- If a hole stretches and the cluster slides, double the neck over before pushing it through
Building in sections keeps the garland from becoming a 15-foot snake on your floor and makes transport easier.
Step 4: Fill Gaps and Shape the Garland
Step back and look for holes. Tuck small balloons into gaps by hand, using the necks to wedge them in place. A common pattern is to add one 5-inch balloon for every two visible gaps, more than that and the garland starts to look cluttered.
Then shape the garland into an S-curve or arch. A straight line looks stiff; a gentle curve looks intentional.
How to Hang a Balloon Garland Without Wall Damage
Hang a balloon garland with adhesive hooks, command strips, or a backdrop stand rather than nails or tape alone. Balloons are light, a 10-foot garland typically weighs 2 to 4 pounds, so removable hooks usually hold fine on painted drywall.
Test one hook with a small section first. If it slips, move to a stand. A common pattern is to place a hook every 3 to 4 feet along the garland’s path, plus one at each end.
Surface-Specific Fasteners
- Painted drywall: removable adhesive hooks rated for at least 3 pounds, tested first. Clean the wall with a damp cloth and let it dry fully before applying, dust is the most common reason a hook fails.
- Brick or stone: tension rod or backdrop stand. Adhesive does not bond reliably to porous or uneven surfaces.
- Wood trim: clips or hooks over the edge, no adhesive. Over-the-door hooks work well on trim and casings.
- Outdoor locations: use a backdrop stand or weighted bases rather than wall adhesive. Sun and heat soften adhesive, and wind adds load the hooks were not rated for.
Never use duct tape or packing tape on painted walls. It pulls paint off on removal, and that repair costs more than the whole garland. The same applies to most painter’s tape once the sun hits it, it leaves residue and can lift fresh paint.
Backdrop Stands and Outdoor Setup
A backdrop stand is the safest choice for rentals, brick, and outdoor events. Set the stand first, then attach the garland with zip ties or ribbon at three or four points along the strip.
Outdoor conditions change the plan: heat expands latex and softens adhesive, sun fades colors within a few hours, and wind adds load. Set up outdoors as close to the event as possible, keep the garland out of direct sun where you can, and check the attachment points once an hour if it is windy.
Removal Without Damage
Remove adhesive hooks slowly, pulling the tab straight down rather than out from the wall. This stretches the adhesive and releases it cleanly. If a hook resists, warm it with a hair dryer on low for 10 to 15 seconds, then try again. For residue, a small amount of rubbing alcohol on a cloth lifts most adhesive without harming paint.
- Remove the garland before the hooks, cut the ribbon or zip ties first so the weight is off the adhesive
- Pull tabs straight down, not outward
- Warm stubborn adhesive before pulling
- Wipe residue with rubbing alcohol, then rinse with a damp cloth
How Long Does a Balloon Garland Take to Make?
A 10-foot balloon garland takes about 1.5 to 2 hours for a beginner, including inflation. A 20-foot garland runs 3 to 4 hours.
Latex balloons start to dull and deflate after about 24 hours. If your event is in the evening, inflate that morning.
Transport tip: build in sections and carry them flat in a large box or bag. Assemble on site.
- 6 ft: 45-60 minutes
- 10 ft: 1.5-2 hours
- 15 ft: 2.5-3 hours
- 20 ft: 3-4 hours
Troubleshooting: Fixing Popped Balloons, Gaps, and Sagging
Most balloon garland problems have a two-minute fix. A popped balloon gets swapped for a spare of the same size. A gap gets a small balloon wedged in. A sagging section gets re-hung with an extra hook.
Here is the fix table we hand out most often.
| Problem | Likely Cause | Fix |
|---|---|---|
| Balloon pops while tying | Overinflated or sharp nails | Inflate 90%, keep nails short |
| Visible gap in garland | Too few small balloons | Wedge in 5-inch balloons by hand |
| Garland sags in the middle | Too few hanging points | Add a hook every 3-4 ft |
| Clusters slide on the strip | Strip holes stretched | Double up or knot the neck |
| Colors look flat | All one size | Mix in smaller accent balloons |
Keep a repair kit of five spare balloons, a pump, and extra strip in a small bag at the venue. You will rarely need it, but when you do, you will be glad it is there.
Conclusion
A balloon garland looks expensive and builds like a craft project. Plan your length, buy a little extra, vary your sizes, and hang it with removable hooks.
If sourcing supplies or building a large garland feels like too much on top of everything else, RI Party Store can help. We stock balloons, strips, pumps, and ribbon, and we offer professional delivery and setup so the backdrop is handled.
Frequently Asked Questions
What materials do I need for a balloon garland?
You need balloons in two or three sizes (5-inch, 11-inch, and 16-inch work well), a balloon strip or balloon tape, a hand pump, balloon ribbon or twine, and mounting clips or command hooks. Optional extras include a 260 balloon for tying clusters, scissors, and a small step stool. For a 6-foot garland, plan on roughly 60 to 80 balloons. If you buy a balloon garland kit, most of these items come bundled together, which saves time for first-timers.
How long does it take to make a balloon garland?
A 6-foot garland takes about 45 to 60 minutes from inflation to final shaping for a first-timer. A 10-foot garland runs closer to 90 minutes. Inflating balloons is the slowest part, so a hand pump or electric pump saves significant time. Build the garland the night before your event if possible. Air-filled balloons hold their shape for several days indoors, though they shrink faster in warm rooms or direct sun.
How do you attach a balloon garland to a wall without damaging it?
Use removable adhesive command hooks rated for the garland’s weight, or tie the strip to a backdrop stand if you have one. Avoid nails and strong tape on painted walls, especially in rentals. For brick or textured surfaces, use clip-style hooks that grip without adhesive. Always test one hook first and remove the garland within 24 hours of the event. Pull hooks slowly at a low angle to protect the paint.
How many balloons do you need for a balloon garland?
A good rule is 10 to 12 balloons per foot of garland for a full, organic look. A 6-foot garland needs about 60 to 72 balloons, and a 10-foot garland needs around 100 to 120. Mix sizes: roughly 60 percent 11-inch balloons, 30 percent 5-inch balloons, and 10 percent 16-inch balloons for visual depth. Fewer balloons create a sparse garland, so buy a little extra to fill gaps and replace any that pop during assembly.