
Planning a Child’s Birthday Party: 7 Easy Steps
Table of Contents
- Step 1: Set a Budget and Pick a Date
- Step 2: Build the Guest List and Send Invitations
- Step 3: Choose a Theme and Book Entertainment
- Step 4: Map Out Your Kids Birthday Party Timeline
- Step 5: Plan Food, Drinks, and Allergies
- Step 6: Rent a Paw Patrol Bounce House and Other Rentals
- Step 7: Use a Party Planning Checklist for Parents
- Party Safety Tips for Children
- Frequently Asked Questions
Last Updated: September 15, 2026
Step 1: Set a Budget and Pick a Date
Birthday party planning starts with two decisions that shape everything else: how much you’ll spend and when the party happens. Nail these first, and every later choice gets easier.
Start with a total number you’re comfortable with, then split it into categories before you spend a dollar. A workable budget allocation looks like this:
- Venue or rentals: the largest single line, especially if you’re booking a bounce house or foam party
- Food and cake: usually the second-biggest expense
- Decorations and balloons: smaller, but easy to overspend on
- Party favors and activities: set a per-child cap
- Invitations and thank-you cards: often overlooked
Pick your date by working backward from the party. Check school calendars, sports schedules, and holiday weekends, because a Saturday afternoon in early fall competes with youth soccer for the same families. Two to three hours is the sweet spot for younger children; older kids can handle a longer party (Playful Birthday Party Ideas & Tips for Young Children).
Book your date and any rentals at least three to four weeks out. Popular weekend slots and themed bounce houses disappear first, and a shorter lead time limits what’s actually available.
Step 2: Build the Guest List and Send Invitations
The guest list is where a party quietly succeeds or fails. A common mistake is inviting the whole class and then scrambling for space, seating, and enough cake.
Match the headcount to your venue and your budget, not to social obligation. A good rule for younger children: one guest per year of age, plus siblings (Playful Birthday Party Ideas & Tips for Young Children). For school-age kids, decide early whether it’s a “whole class” party or a small-friends party, because parents talk and mixed signals create hurt feelings.
Build an inclusive guest list from the start
Most party guides treat the guest list as a numbers problem. It’s also an access problem, and handling it early is what separates a smooth party from a stressful one. A few deliberate choices cover the majority of situations:
- Ask about sensory needs, not just allergies. Add a line to the invitation: “Anything that helps your child have a great time? Noise, crowds, food, or sensory sensitivities?” Parents of neurodivergent kids rarely volunteer this unless asked, and asking costs you nothing.
- Designate a quiet zone. A bedroom, a covered porch, or a corner with a beanbag and headphones gives any child an escape hatch. Kids who get overwhelmed don’t need to leave the party; they need a place to reset for ten minutes.
- Keep the invitation honest about noise and crowd level. If you’re renting a bounce house with a blower motor and hosting 20 kids, say so. A parent of a child with sound sensitivity can then plan accordingly, or RSVP no without guilt.
- Offer a food-allergy disclosure line, not just a checkbox. “Please list any allergies or dietary needs” gets you usable information. “Any allergies? Y/N” does not.
- Confirm accessibility at the venue. If you’re hosting at a park, community center, or rented hall, check whether there’s step-free access, an accessible restroom, and parking close to the entrance. If the answer is no, say so on the invitation so families can decide.
What to put on the invitation
Send invitations with these details included:
- Date, start time, and end time (end times matter more than parents admit)
- Address, parking notes, and whether the venue is step-free
- Whether siblings are welcome
- Food being served, plus a line for allergies and sensory needs
- A quiet-space note if you’re providing one
- RSVP deadline and a phone number or email
- Whether gifts are expected, optional, or being replaced with a donation or group gift
Digital invitations work well for quick RSVPs and automatic reminders. Physical invitations still land better with grandparents and for keepsakes. Many families use both.
Send invitations three to four weeks out for a standard party, and four to six weeks out if you’re inviting a whole class or hosting during a busy season. A shorter window quietly shrinks your RSVP rate, which makes every later decision harder.
Track RSVPs and allergy notes in one place
A group text is not an RSVP system. Pick one place where the guest list, RSVPs, allergy notes, and sensory notes all live, and update it the day each reply comes in. A shared spreadsheet, a notes app, or a dedicated party-planning app all work. The point is that when you’re standing in the grocery store the night before, you can answer “how many kids, and who can’t have nuts” in ten seconds.
CDC food allergy guidance for hosting safe gatherings
Step 3: Choose a Theme and Book Entertainment
Pick a theme your child actually loves right now, then let it guide decor, tableware, and activities. A theme isn’t decoration for its own sake. It gives you a shortcut for every other decision.
Entertainment is where parties create their wow moment. For younger kids, a themed bounce house or foam party keeps a group happily occupied for a full hour, which is worth more than any favor bag. If you’re booking a paw patrol bounce house or similar character inflatable, reserve it early and confirm the setup window against your venue’s rules.
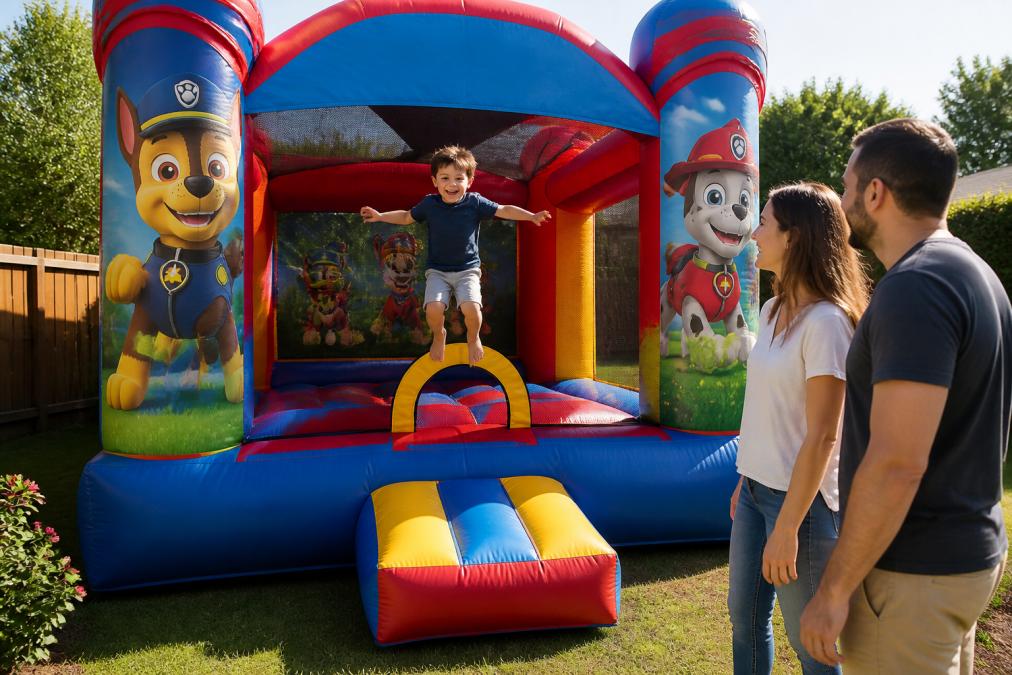
Families with kids ages 3-8 who want built-in entertainment that runs itself. A themed inflatable handles the “what do we do now” problem before it starts.
Step 4: Map Out Your Kids Birthday Party Timeline
A kids birthday party timeline turns a chaotic afternoon into a predictable one. Write it down, share it with anyone helping, and stick to it loosely.
Here’s a structure that works for a two-hour party:
| Time | Activity | Notes |
|---|---|---|
| First 20 min | Arrival and free play | Music on, name tags ready |
| Next 30 min | Structured play or entertainment | Bounce house, games, or performer |
| 20 min | Food and cake | Serve before kids get overtired |
| 20 min | Party games and activities | Keep two backups ready |
| Final 20 min | Favors, thank-yous, pickup | Hand favors at the door, not earlier |
Build in party flow with both structured play and free play. Kids need a loose stretch to burn energy, but a totally unstructured party drifts into chaos fast. Keep two backup games in your back pocket for the moment attention drops.
Step 5: Plan Food, Drinks, and Allergies
Food is simple if you keep it simple. For a two-hour party, you’re feeding kids a snack, not a meal.
Serve kid-friendly finger foods that don’t need utensils: pizza, fruit, veggie cups, and a cake or cupcakes. Offer water and one juice option. Skip anything that melts, stains, or requires a fork.
Food allergies are the part you cannot improvise. Ask about allergies on the invitation, then plan around them:
- Keep a written list of every confirmed allergy
- Label dishes and keep packaging for anything store-bought
- Set aside allergy-safe portions before serving shared food
- Avoid common allergens in favors, especially nuts and chocolate
Never guess about an allergy. If a parent says a child has a severe allergy, treat the whole food table as if that child’s safety depends on it, because it does. Cross-contamination from a single serving spoon is a real risk.
Step 6: Rent a Paw Patrol Bounce House and Other Rentals
Rentals do the heavy lifting at a kids’ party. A bounce house, foam party setup, or balloon arch delivers more entertainment value than a stack of small toys, and it keeps kids moving.
When you book rentals, confirm four things in writing:
Measure your setup space before you book, not after. Inflatables need clearance on all sides and a flat surface. A unit that “should fit” often doesn’t once stakes, blowers, and safety margins are added.
Step 7: Use a Party Planning Checklist for Parents
Here’s a checklist you can copy:
The post-party phase most guides skip
The party isn’t over when the guests leave. A gift recorder, a two-week thank-you deadline, and a written pickup window for rentals turn the post-party phase from a scramble into a routine.
Party Safety Tips for Children
Work through this list before guests arrive:
The single most effective safety measure is adult coverage. One adult per activity zone prevents nearly every common party mishap, from bounce house collisions to food-table crowding.
Frequently Asked Questions
What are the steps involved in organizing a child’s birthday party?
Start by setting a budget and picking a date. Then build the guest list, choose a theme, and book any rentals or entertainment. Plan your kids birthday party timeline, organize food and drinks, and create a party planning checklist for parents. Finally, review party safety tips for children and prepare for post-party cleanup. Following these steps keeps you organized and reduces stress.
How far in advance should I plan a kids birthday party?
Begin planning 4 to 6 weeks ahead for a typical at-home party. If you are booking a venue or popular entertainment like a paw patrol bounce house, start 8 weeks out. Send invitations 3 to 4 weeks before the party so guests can RSVP. For peak seasons like late spring or early fall, add an extra week or two to secure your preferred date and rentals.
What order should you do a birthday party?
A smooth party flow starts with arrival and free play as guests trickle in. Once most children arrive, move to structured play, such as games or a bounce house session. Then serve food and cake. After eating, open gifts if you choose, followed by more free play or a calm activity. End with party favors and goodbyes. This order keeps energy high without overwhelming kids.
How do you create a realistic budget for a child’s party?
List all potential expenses: venue or rentals, food, cake, decorations, invitations, favors, and entertainment. Assign a percentage to each category, with rentals and food usually taking the largest share. Set a total amount you are comfortable spending and track deposits. Remember that party supplies and rental costs vary by quantity, date, and delivery location, so request quotes early and leave a 10% buffer for last-minute needs.